
Creating a window box for flowers is a rewarding project that not only adds a burst of color to your home but also enhances its curb appeal. Whether you live in a suburban house or a city apartment, a window box can bring a touch of nature right to your windowsill. In this guide, we’ll walk you through the process of building your own window box, from selecting the right materials to planting your favorite flowers.
Materials You’ll Need to Build a Window Box
Before you start, gather the following materials:
- Wood: Cedar, redwood, or treated pine are excellent choices because they resist rot. You’ll need wood for the front, back, sides, and bottom of the box.
- Screws or nails: To assemble the box.
- Wood glue: For added stability.
- Drill: For making drainage holes and assembling the box.
- Saw: To cut the wood to the desired length.
- Measuring tape: For accurate measurements.
- Sandpaper: To smooth the edges.
- Paint or wood stain: To finish the box and protect it from the elements.
- Plastic liner (optional): To help protect the wood from moisture.
- Potting soil and plants: Your choice of flowers, herbs, or plants to fill the box.
Step-by-Step Instructions
Measure and Cut the Wood
Start by measuring the length of your window to determine the size of your window box. Most window boxes are 6 to 8 inches wide and 6 to 8 inches deep, but you can adjust these dimensions based on your preference and the size of your window.
Once you’ve measured, use a saw to cut the wood into the following pieces:
- Front and back panels: The length of your window plus a couple of extra inches.
- Side panels: The depth you’ve chosen for your box.
- Bottom panel: The same length as the front and back panels and the same width as the side panels.
Assemble the Box
Next, use wood glue to attach the side panels to the front and back panels. Hold them together firmly until the glue sets. Once the glue is dry, reinforce the joints by driving screws or nails through the sides into the front and back panels.
Attach the bottom panel using the same method. Ensure that all pieces are securely fastened and the box is sturdy.
Sand and Finish the Box
After assembling the box, use sandpaper to smooth any rough edges and corners. This step is essential for both aesthetic reasons and safety, as it prevents splinters.
Once the box is smooth, apply a coat of paint or wood stain to protect it from the elements. You can choose a color that complements your home’s exterior or go for a natural wood look. Allow the finish to dry completely before proceeding.
Add Drainage Holes
Proper drainage is crucial for the health of your plants. Use a drill to create several holes along the bottom of the box. These holes will allow excess water to escape, preventing root rot and other issues.
If you’re using a plastic liner, place it inside the box after drilling the holes. Make sure the liner also has holes aligned with the drainage holes in the wood.
Fill the Box with Soil and Plants
Now it’s time to fill your window box with potting soil. Choose a high-quality potting mix that provides good drainage and contains nutrients to support plant growth.
Plant your flowers or herbs in the soil, arranging them in a visually pleasing pattern. Consider the light requirements of each plant and place taller plants at the back and trailing plants at the front for a balanced look.
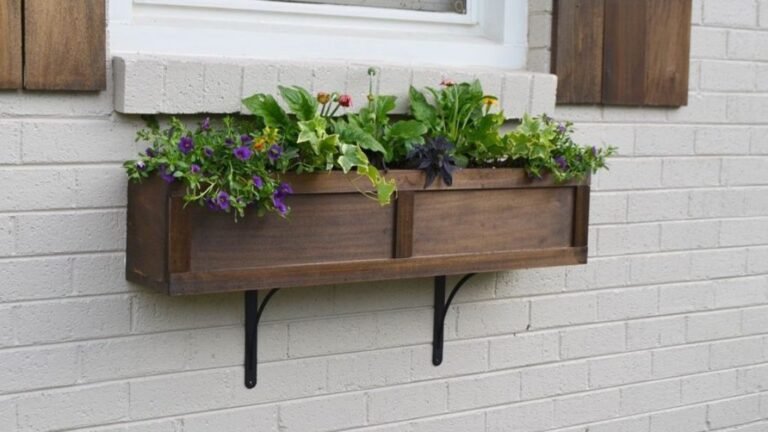
Install the Window Box
Finally, it’s time to install your window box. Depending on the weight and size of the box, you may need brackets or other hardware to secure it to the windowsill or wall. Make sure it’s level and firmly attached to prevent accidents.
Water your plants thoroughly and regularly check the soil moisture to keep them healthy and thriving.
Tips for Maintaining Your Window Box
- Water regularly: Window boxes tend to dry out quickly, especially in hot weather. Check the soil daily and water as needed.
- Fertilize: Use a balanced fertilizer to feed your plants every few weeks.
- Prune and deadhead: Regularly remove dead flowers and trim overgrown plants to encourage new growth and maintain a tidy appearance.
ALSO READ: Why Is My Carbon Monoxide Detector Beeping?
Conclusion
Building a window box for flowers is a fulfilling project that adds beauty and life to your home. With the right materials, a bit of time, and some creativity, you can create a charming space for your favorite plants to flourish.
FAQs About Building a Window Box for Flowers
Q: What type of wood is best for a window box?
A: Cedar, redwood, and treated pine are all excellent choices because they are resistant to rot and can withstand outdoor conditions. Cedar is particularly popular due to its natural insect-repelling properties.
Q: Do I need to use a plastic liner in my window box?
A: A plastic liner is optional but recommended. It helps protect the wood from moisture, extending the life of your window box. Just make sure the liner has holes for drainage.
Q: How often should I water the plants in my window box?
A: This depends on the weather and the types of plants you have, but generally, window boxes need to be watered more frequently than ground plants, especially during hot, dry periods. Check the soil daily and water when the top inch feels dry.
Q: Can I grow vegetables in a window box?
A: Yes, many vegetables like lettuce, spinach, and herbs can be grown in a window box. Just make sure they get enough sunlight and that the box is deep enough to accommodate their root systems.
Q: How do I prevent my window box from rotting?
A: To prevent rot, use rot-resistant wood, apply a waterproof sealant or paint, and ensure proper drainage. Regularly check the box for signs of wear and tear, and address any issues promptly.


